Visual Design
1.00: Apply procedures to use Adobe Photoshop for visual communications.
1.01: Understand project requirements using photographs.
1.02: Understand Digital Images.
1.03: Understand Adobe Photoshop CC interface.
1.04: Apply procedures to create images using Adobe Photoshop CC.
1.05: Apply procedures to publish digital images using Adobe Photoshop CC.
Knowledge Base
1.01: Photoshop Project Requirements
1.03: Understanding Photoshop
1.02: Digital Images
1.04: Creating Images in Photoshop
1.05: Publishing Images in Photoshop
Project 1 (Photoshop)

The objective of this project is to obtain a better understanding of Photoshop Layers by creating the layers of a sandwich on a plate. Utilizing layers effectively is a key skill to have in order to create efficient and fully editable graphics. If layers are not used effectively, it can be detrimental to the success of your project.
You have been hired to create a graphic design for Tom's Diner. The owner wants a BLT sandwich with sides as a graphic for the diner. He has supplied you with an image of a plate from the diner, as well as images of the ingredients for the sandwich. You are to follow the directions given by the project manager to complete the project for the target audience. There is a PDF tutorial located to the right to help you complete this project. However, since this is the first project we will be completing in Photoshop, we will walk through this procedure together as a class. Remember as you look for other items on-line to add to your sandwich to make sure to find high resolution images with a solid color background.


Project 2 (Phtoshop)

This is a refresher on how to Use Photoshop and remove backgrounds. This shouldn't take you more than 45 mintues. Use the images provided to create a layered desk like the example. You will need to cut out and mask each image cleanly. In this version of layering, we will be using "non destructive editing". You will still use the magic-wand tool, "q", and the brush tool to select, but will use the "layer mask" button (shown below) instead of the delete key to remove the white background.

Project 3 (Photoshop)

We are going to start small today with a simple activity to continue helping your remember how to use Photoshop. You will use the tutorial found to the right along with a group of images that you will find online (large, high quality only please) to create your own Lettering Image.
You need need to first open up Photoshop.

B/W to Color Project
Adobe Photoshop is a very powerful image editor that can bring life to otherwise dull and unexciting photos. Using the tools and features of the software, a photographer can take his or her pictures to the next level and produce professional-looking images.
In this project, you will learn how to use the selection and coloring tools of Photoshop to add a splash of color to a black and white photo. The overall goal is to bring a dull photo back to life by accurately coloring the components to make them seem life-like.
Choose one of the black and white images below and use the refined selection tools of Photoshop to carefully select particular areas and add color. Be sure to add each color on its own layer just in case you need to make adjustments later on. Leaving several colors on the same layer (especially the background layer) can result in you having to start your project all over again.
Tutorial
Rubric


Now that you've learned how to precisely add color to a black and white image, apply that knowledge in a fun and personal setting. In this project, you are going to paint several renditions of a picture of yourself and arrange it in a grid. A famous artist that used this technique to develop pop art advertising is Andy Warhol. Mimic this technique to create an original, personal piece of art.
First you will use the on-board camera of the Apple iMac to take your picture. Be creative with your pose so your project will be appealing and interesting! You will apply a filter inside Photoshop to make it look like a black and white sketch, then use your selection and coloring techniques to create the Warhol effect. You want to have a minimum of 3 different colors per box. Remember to use bright colors!
As you work, save your project as a .psd and name it lastname + first initial + warhol.psd. When you are finished, save it again as a JPEG with the same name (ex: davisjwarhol.jpg) Post the .JPG file to your website. Don't forget to review the rubric to make sure you are meeting all of the project requirements!

Warhol Project

Reflections

You have been hired by a image editing company that wants you to design an product display for their biggest client. Your job is to take a group of products and showcase them on a stage that reflects their image to make them seem more appealing and attractive.
Create a new Photoshop document that is 720 x 480 pixels. Create a stage and a background for your products. You can create a color background with highlight and add a filter. Place at leastthree different objects on the stage, the manufacturer logo on the wall, and create a reflection on the stage for each item that touches the stage. All of the products must be made by the same manufacturer. Make sure you orient the objects in the most appealing way and make them look good! All objects that are on the stage must reflect. Do not use images that are tilted at an angle. They are more difficult to reflect.
There is a PDF tutorial located to the left to help you complete this project.
Tutorial
Rubric

Beetle Ad Project
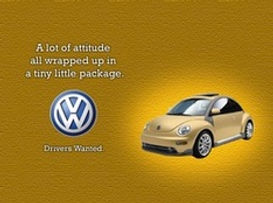
You have been hired as a graphic designer by VW. They want to see what other colors they should offer in the beetle and to see an example of how toadvertise their product. Your final product must be a well-developed, attractive advertisement complete with the car's manufacturer logo and unique catchy slogan. Your background and your car should be the same color. Add a layer style to the text to make it stand out. Come up with an original catch phrase slogan. There is a PDF tutorial located to the left to help you complete this project.
Be sure to arrange your components in a way that utilizes the Elements and Principles of Designand accomplishes your intended purpose. Your finished product will look similar to the example above, but may have a different background, different car color, and different catch phrase. Two-tone the car to challenge your skills and ablities.
Tutorial
Rubric


Backgrounds


Challenge #1

This is a challenge project. If you find yourself finishing the basic skills projects quickly, try one of the challenge projects. The tutorial for this project tells you to download a couple of images, bu the links don't work, so I have included them below. Don't worry about downloading the brush.


Mash-Ups

How do you take 2 different pictures and make them into a mash it up that is completely integrated together? Select a minimum of 2 photographs that you think could be put together in a way that makes a new thing. Make sure you can't tell where the mash ups occur. BE CREATIVE!! You will need to make at least 3 Mash Ups. Make sure you don't use any of the inspirations ideas you see here. Instead BE CREATIVE!! This is a test of your photoshop abilities and your creative. When I look at this, I should not be able to tell where the images were combines. You will need to find your own images, make sure you look for high resolution images to work with.
You will need to save both images as a .JPEG as lastname + firstname + Mash up 1, Mash up 2, etc....


Selfie Magazine Cover Capstone


This is a Capstone project. This means that you will demonstrate what you've learned in the previous lessons without a project tutorial. As a capstone, this project counts double in the grade book.
You have learned some very useful tools and features of Adobe Photoshop by now. Now it's time to apply both your newly learned skills, and the knowledge we've been learning in class discussions. In this project, you will apply the Elements and Principles of Design to create an original, attractive magazine cover.
One key requirement in this project is to superimpose your subject (photo) over the title text of your magazine. Also, you will need to generate a bar code, and create at least three "tags/teasers" on your cover. This is about integrating images and text. Make sure your teasers "flow" with your image.
Choose your favorite magazine and create a magazine cover like it in Photoshop. Add a picture or two of the typical cover images this magazine would use - these could be products or famous people. Be sure your images are clean and attractive and not pixelated. The size of the project will be 8.5" width x 11" height in inches with 300 resolution. If these were going to be sent to an actual print company then you would use 300 as the resolution. Next, use font sites like dafont.com to select a couple appropriate fonts and add headlines and tag-lines (Teasers) to your magazine cover. Be sure to practice unity, balance, emphasis, and proportion!
Beginner
Choose 2 PS

Blending, Feathering, and Smoothing

Use the How to Blend, Feather, and Smooth to remove the from the image to the right. Place on a solid colored background with all the edges smooth all the edges. Then you will need to go and find 2 additional images you can apply this skill too and change the size of the main subject. Look for high resolution images. You will need to save this as a .JPEG as lastname + firstname + period + Blend 1 (2,3) and put into your Advanced Photo Editing Folder.
Refine Edge is now called SELECT and MASK!

Click on the button to link directly to the Gmetrix practice testing website.
Chrome Text Effect

Use the link button below to illustrate your name with a chrome text effect.
Typography Portrait

Use the link button below to create a typography Portrait of your choosing. Please remember your image must be rated G and safe for school.
Project (Illustrator)

In this project you are going to create an illustration based upon a selfie. You'll use photobooth to obtain your selfie, Illustrator to create your line work, and Photoshop to fill and add effects.
We're going to play with several tools in the Illustrator software; most notably the pen tool, the anchor point tool, the selection tool, the direct selection tool. We will also explore the layer panel and the control panel.
In this project, it is important to remember that "less is more".
Photoshop is a "bitmap" software, and illustrator is a "vector" software. You will need to know the difference between the two.
We will also be exploring the "fx" panel, and several other tools in Photoshop, You need to be prepared to take notes regarding tools and "keyboard shortcuts".
Low Poly Art (Illustrator)

Use the link provided below to create a low poly art creation. You may use a person or animal for your subject matter.
Intermediate Illustrator
Intermediate
Choose 1 IL

Click on the image at left to link to the illustrator Intermediate Project page. Find a tutorial that interests you and follow the instructions.
Adobe InDesign
Manage Colors
Download the Managing Colors Worksheet (at right) and read How to Manage Colorsfound the right and create the list below. Use Ctrl + Shift + 4 to take a screen shot to show me what you have done. When you have finished, you will save it as an .indd and a .pdf file, saving the files as LastName + FirstName + Period + Manage Colors and add it to your folder.
-
1 new color swatch
-
a swatch of the new color but with a 50% tint
-
a swatch with a gradient effect
-
A gradient with a tint
-
A letter with a stroke
-
3 different shapes with 3 different levels of transparency
Document Setup
Read How to setup a document. You will use this guide to help you create a new document. Follow the guides exact directions to achieve a document that looks like Figure 11.
Envelopes
Read How to Use Grids and Guides to add guides for you to use on the envelop. Add a grid for the address, stamp, and return address. Make sure you are using proper alignment. Then add text boxes for the address and return address. Make up any address to fill the boxes. Chose a new font and adjust the spacing of your characters and lines so that it looks correct.
Text Frames
Down the Text Frames Worksheet and read How to Work with Text Frames Tutorial found the right and then complete the worksheet you downloaded. You can use any words and images you would like to complete the worksheet (as long as it is school appropriate).
When you have finished, you will save it as an .indd and a .pdf file, saving the files as LastName + FirstName + Period + Text Image and add it to your folder.
Text Filled with an Image
Down the Text with Image Worksheet and read How to Fill Text with Image found the right and then complete the worksheet you downloaded. You can use any words and images you would like to complete the worksheet (as long as it is school appropriate).
When you have finished, you will save it as an .indd and a .pdf file, saving the files as LastName + FirstName + Period + Text Image and add it to your folder.